Skip to content
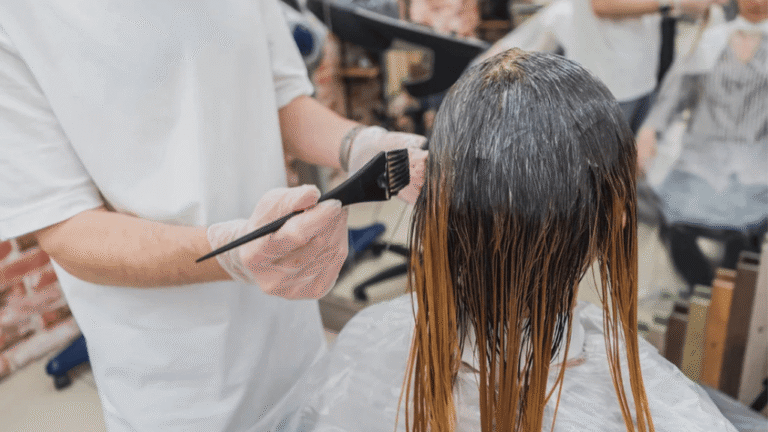
Ready to build steady, confident eye makeup? This short guide shows how to map, draw, and refine a precise cat eye using tools that match your skill: pencil for control, liquid for sharpness, gel for drama, or cream for softness.
From real experience — including a creator who rebuilt confidence after amblyopia — the approach focuses on a thin-to-thick line along the upper lid and gentle wing extensions when desired. Start with eyeshadow first so liner stays clean and smudge-free.
We cover tool choice by skill level and simple tips to balance asymmetry or a lazy eye. You’ll learn steadying tricks, removal methods that protect lashes, and ways to adapt looks for work or weekend boldness.
Key Takeaways
- Map first: thin at the inner eye, build thickness outward.
- Choose a pencil to learn, then progress to liquid or gel.
- Apply eyeshadow before liner to avoid smudging.
- Use targeted practice to correct asymmetry and boost confidence.
- Learn gentle removal and maintenance to protect lashes long-term.
What You’ll Learn in These Eyeliner Tutorials
Here we map the essential flow — from prepping lids to finishing a crisp wing — so practice pays off fast.
Key learning goals: You’ll apply eyeshadow before liner and build a steady line using short, controlled strokes. Start thin at the inner corner and increase thickness toward the outer edge to lift the eye shape.
- Follow a clear step sequence: prep, base eyeshadow, map the lash line, draw, then refine.
- Pick the right method for your skill: pencil for beginners, liquid for precision, gel for intensity, cream for glide.
- Practice brush handling and pressure control to keep the upper lash line smooth and consistent.
- Use simple aids — tape or a business card — to angle wings with confidence.
- Work on fast drills and checks so small corrections replace full redraws; expect visible improvement within weeks.
Pro tip: Let product set over eyeshadow to reduce transfer and keep your finish durable for everyday wear.
Tools, Textures, and Prep for a Flawless Line
Start by matching liner texture to the finish you want—soft, sharp, or bold—and pick tools that give control.
Pencil vs. Liquid vs. Gel vs. Cream
Pencil offers beginner-friendly control and is ideal for softly defining the lash line or smudging for diffusion.
Liquid (pen or vial) creates the thinnest, crispest line. Gel in a pot plus an angled brush builds drama and smooth wings. Cream formulas give a lived-in, softer finish and may come in pencil form.
Brushes, Wands, and Angled Tools
Choose an ultra-fine tip for precise flicks, a felt-tip pen for speed, or an angled brush to stamp clean edges along the upper lash line.
Rest your elbow on a counter and anchor a finger on the cheekbone to steady strokes and maintain even pressure.
Prep Steps and Long-Wear Picks
Clean excess oil from the lid skin, apply and set eyeshadow first, then curl lashes so you don’t disturb the finished line afterward.
For hooded lids, pick waterproof liquid and quick-setting formulas to reduce transfer onto the upper lid. Keep a pointed cotton swab and oil-based remover handy for precise fixes.
- Adjust pencils: sharpen for a thin line, dull for smudging, warm for glide, or chill to firm at the corner.
- Maintain tools: wipe wands and wash gel brushes to avoid buildup that causes dragging or clumps.
- Build in short strokes: avoid one-pass tugging; work from inner to outer corner with steady pressure.
Want ideas that pair with these prep steps? See our guide to eyeshadow designs for looks that complement each liner texture.
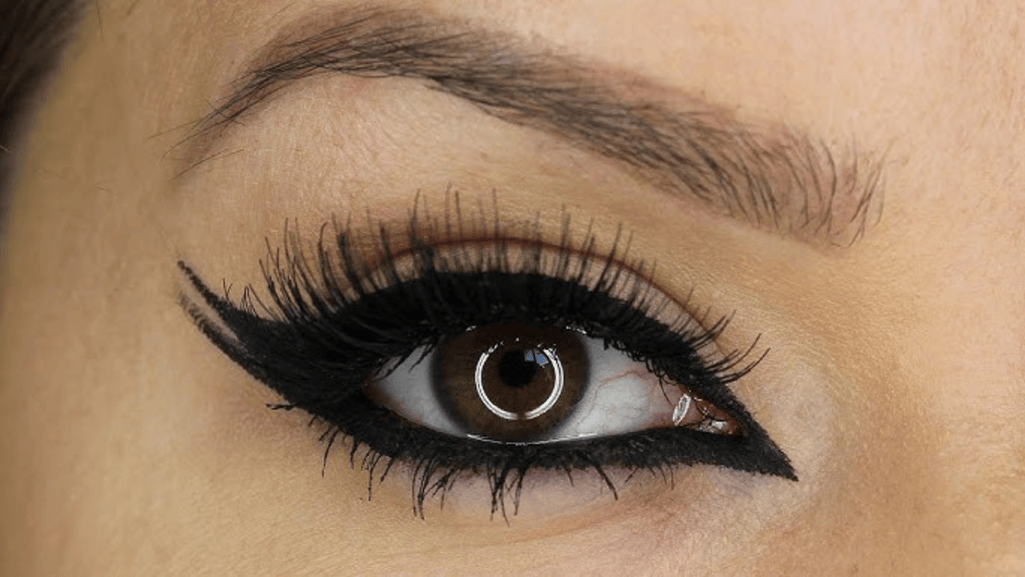
Step-by-Step Cat Eye: From Upper Lash Line to Wing
Begin with a mapped guideline that keeps the inner corner delicate and the outer corner lifted.
Map the line: On the upper lash line, keep the inner corner fine and let the line gradually expand toward the outer corner to lift the eye. Start your liquid or gel line from the middle outward, then connect back to the inner portion for a smooth, controlled finish.

Create the wing
Sketch the wing by following the lower lash line upward toward the tail of the brow. Connect the tip back to the main line to form a small triangle, then fill it evenly so the edge is crisp and continuous.
Refine and set
Use short, overlapping strokes with a steady brush to avoid gaps. Tightline at the roots of the upper lashes to erase skin gaps between lashes and the line.
- For straight wings, align a business card or tape at the same angle on both corners.
- Clean mistakes with a pointed cotton swab dipped in oil-based remover to sharpen edges without ruining the rest of the look.
- Finish with mascara at the roots of the lashes and press a matching shadow or translucent powder over the line to lock wear.
Adapting Techniques for Different Eyes and Real-Life Asymmetry
Different lids call for different product choices and placement so the line reads the way you want.

Map with your eyes open in a mirror so the visible line matches your relaxed gaze. This shows real endpoints and helps you plan the wing and outer corner for both sides.
Hooded and deep-set tips
For hooded lids or deep-set eye shapes, choose a quick-drying waterproof eyeliner to resist transfer. Place the wing a touch higher and more outward so it stays visible when the eyes are open.
Working with asymmetry
Start thin at the inner corner and build above the lash line where the fold won’t immediately stamp product. If one eye sits higher, alter wing length or tilt on that side to create balanced shapes rather than forcing exact matches.
- Use a pencil to sketch a template, then trace with liquid or gel once balance looks right.
- Prefer micro-corrections: add a hair’s thickness to the shorter wing or taper the longer one with remover.
- Set the line with matching shadow to reduce transfer and soften ridges on textured skin.
An expert tip: widen the center line slightly for comfort and visibility instead of hiding a wing in the crease. Keep notes on what angles and distances work best so you can repeat them consistently.
Beyond the Classic: Winged Eyeliner Looks to Try
Small changes to your wing can shift a look from classic to editorial in minutes. Try one of these variations to refresh your routine while keeping technique simple and repeatable.

Double wings
Double wings add a second, shorter flick above the main wing at the same angle. Keep the spacing clean so both lines read as intentional design.
Stamp the top wing first with the side of a felt tip, then pull a fine tail to match the lower flick. This makes parallel lines easier to align.
Colored wings
Swap a black liner for navy, brown, or metallics to change the mood without heavy shadow. Navy or brown softens while metallics lift the look for evening.
For a work-to-dinner option, trace a thin black base then layer a colored liner on top for subtle dimension. See more creative options with colored liner inspiration here.
Floating wings
Floating wings are disconnected lines placed above the crease or outer third for an editorial effect. Focus on crisp edges and symmetry.
- Keep your brush or felt tip sharp and lightly loaded to avoid pooling at the outer corner.
- Use a pencil to sketch shapes first, then lock edges with a liquid pass.
- Balance bold eyes by softening the lower lid with a taupe shadow or nothing at all.
Coordinating Your Eyeliner with the Rest of Your Makeup
Pairing your wing with the rest of your face lets a single feature lead or harmonize the whole look. Decide whether the eyes or the lips will be the hero before you start. This makes application faster and more intentional.
Balance basics:
- Face balance: If your eye makeup is dramatic, keep complexion and lips minimal. If the wing is subtle, a saturated lip can be the focal point.
- Match mascara weight to liner thickness so lashes support—not fight—the flick.
- Keep the lower lash line light or bare when the top is bold to avoid closing the eye; a soft taupe shadow adds balance.
Occasions and glasses:
- For work, use a crisp, defined liner finish. For weekends, a smudged lash line reads relaxed and intentional.
- People who wear glasses should test the wing head-on. Slightly thicker lines and a lifted angle keep the flick visible behind frames.
Build eyeshadow first, set any cream products, then place the liner so blending won’t disturb a sharp edge. For evening looks, a thin metallic overlay on the wing catches light; daytime favors brown or matte tones for office-ready restraint.

Eyeliner Tutorials: Pro Tips, Fixes, and Maintenance
A few expert tricks help you soften hard lines and protect delicate skin around the eye. These fast fixes keep your look sharp and prevent tugging that harms lashes.

Quick fixes: If a wing feels harsh, lightly buff the edge with a small fluffy brush or press a matching shadow over the line for a softer finish. For uneven strokes, trace a thin pass only where needed instead of thickening the whole line.
Makeup remover methods: To remove product safely, saturate a pad with oil-based makeup remover, press it on the closed eye for 10–15 seconds, then glide outward gently. For precise cleanup, dip a pointed cotton swab in remover and shave the wing from underneath to sharpen without widening the edge.
- Protect the delicate eye area by avoiding rubbing; press and lift instead.
- Condition lashes—avoid rough tugging and use oil-balancing cleansers if you wear waterproof liner often.
- Keep a micro-angled brush and a tiny concealer step to define razor-sharp contrasts at the lash line.
Practice plan: Spend five focused minutes every few days practicing steady strokes. Log your go-to angles and product combos. This method builds muscle memory in weeks, not years, and turns a shaky step into a reliable routine.
Conclusion
Wrap up by locking in a short practice plan that builds steady cat-eye skills fast.
You now have a clear framework: prep, map thin-to-thick along the upper lash line, draw, refine, and set for a polished look that lasts.
Choose textures that match your goal—pencil for control, liquid for crispness, gel for boldness—and use the right brush for precision. Keep the inner section fine and the outer section fuller to lift the eye. Extend a wing from the lower lash line for a seamless finish.
Practice briefly and often. Remove gently with an oil-based product to protect lashes. For extra ideas on pairing looks, see this simple eye makeup guide: simple eye makeup looks.
FAQ
How do I choose the best liner type for a cat eye?
What tools help create a clean outer corner and wing?
What prep steps improve line control and longevity?
How do I map a cat eye when my eyes are asymmetrical?
What’s the step-by-step for a stable upper lash line and wing?
How can I adapt a winged look for hooded or deep-set eyes?
What quick fixes work if my wings are uneven or messy?
Which colored or creative winged looks are easiest to try?
How do I remove long-wear formulas without damaging lashes?
How can beginners build steady strokes and confidence quickly?