Cleaning your makeup sponges is essential for maintaining good hygiene and achieving a flawless What does primer do for makeup application. Neglecting to clean your sponges can lead to a buildup of bacteria, oils, and makeup residue, which can cause breakouts and irritation. In this easy guide, we’ll show you step-by-step how to properly clean your makeup sponges, including the popular Beautyblender.
Key Takeaways:
- Regularly cleaning your makeup sponges is crucial for maintaining good hygiene and preventing breakouts.
- Makeup sponges, including the popular Beautyblender, can accumulate bacteria, oils, and residue over time.
- Cleaning your sponges at least once a week is recommended, but ideally, you should clean them after each use.
- There are multiple effective methods for cleaning makeup sponges, such as using a silicone pad or a gentle soap.
- Thoroughly rinse and dry your makeup sponges after cleaning to maintain their integrity.
How Often Should You Clean Your Beautyblender?
 Properly cleaning your Beautyblender or makeup sponge is crucial to maintain optimal hygiene and achieve a flawless makeup application. But how often should you clean it?
Most experts recommend cleaning your Beautyblender at least once a week. This regular cleaning routine helps prevent the buildup of bacteria, oils, and makeup residue that can accumulate on the sponge. By cleaning it regularly, you can ensure that your Beautyblender remains in good condition and free from any contaminants that could cause skin irritation or breakouts.
Of course, cleaning your Beautyblender after each use would be ideal for maximum hygiene. However, we understand that this may not always be practical, especially for busy individuals with limited time. Dermatologists suggest making it a Sunday-night routine to start your week with a fresh and clean Beautyblender. This way, you can remove any leftover makeup or product buildup from the previous week and start with a clean canvas.
Regularly cleaning your Beautyblender not only ensures proper hygiene but also helps maintain the performance of your makeup. A clean sponge allows for better product application, ensuring smooth and flawless results. It prevents any residue from previous applications from affecting the finish of your current makeup. So, whether you’re using a primer to achieve a flawless makeup base or applying foundation for a seamless look, cleaning your Beautyblender is key to achieving the desired effect.
Remember, a clean Beautyblender is a happy Beautyblender. So, make it a habit to clean your sponge regularly and enjoy the benefits of a flawless makeup application.
The Function of Makeup Primer
Before we delve further into the topic of cleaning your Beautyblender, let’s explore the function of makeup primer. A makeup primer acts as a base for your foundation or other makeup products, creating a smooth canvas and extending the wear time of your makeup.
Makeup primers are specifically designed to enhance the appearance and longevity of your makeup. They create a barrier between your skin and makeup, preventing oils from breaking down the products and ensuring a flawless finish that lasts throughout the day. By filling in fine lines, pores, and wrinkles, primers create a smooth surface and help your makeup adhere better, resulting in a more even and sophisticated look.
In addition to extended wear time and improved adherence, makeup primers can also provide specific benefits depending on the formula. Some primers offer hydration, while others target specific skin concerns, such as reducing redness or brightening the complexion. Choosing the right primer for your specific needs can enhance your overall makeup application and help you achieve the desired look.
Now that we understand the function of makeup primer, let’s dive back into the essential topic of cleaning your Beautyblender.
Methods for Cleaning a Beautyblender
The Beautyblender is a versatile tool that helps achieve a flawless makeup finish. To ensure its longevity and hygienic use, it is important to clean the sponge regularly. Here are some popular and efficient methods for cleaning your Beautyblender:
- Texturized Silicone Pad: Using a texturized silicone pad, gently scrub the sponge under running water. The textured surface helps to release and remove makeup stains effectively.
- Gentle Soap or Cleanser: You can opt for Beautyblender’s Blendercleanser or a mild dish soap to clean the sponge. Apply a small amount of soap or cleanser to the dampened Beautyblender, then gently massage it to create a lather. Rinse thoroughly until the water runs clear.
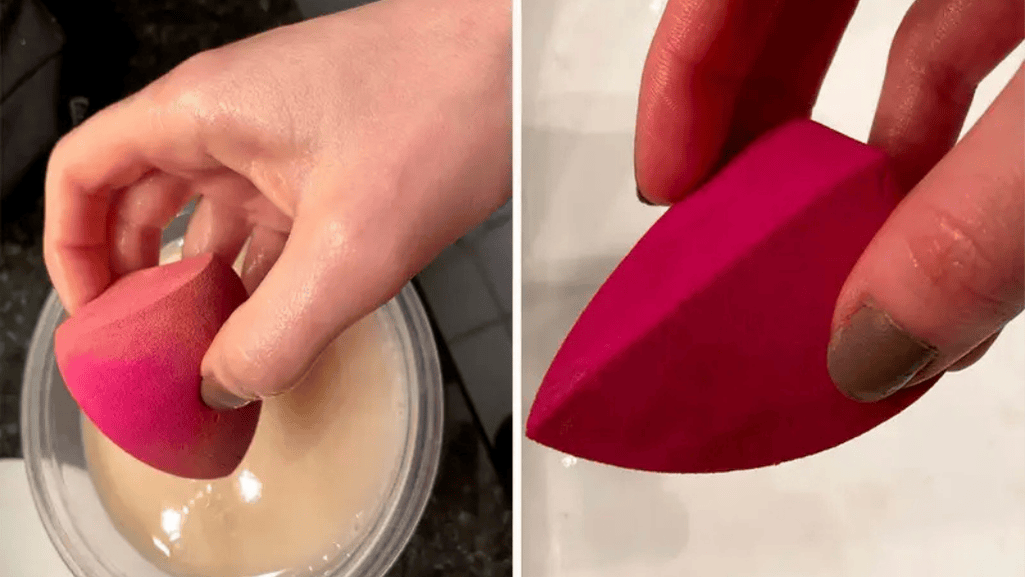
- Liquid Cleanser Soak: If your Beautyblender requires deep cleaning, you can soak it in a liquid cleanser. Fill a bowl or container with warm water and add a few drops of the cleanser. Place the Beautyblender in the solution and let it soak for a few minutes. Massage the sponge to release any trapped makeup, then rinse it well.
- Microwave Method: For a quick and effective clean, you can also microwave your Beautyblender. Place the wet Beautyblender in a microwave-safe container filled with water and a mild soap or cleanser. Microwave for approximately one minute or until the water starts to boil. Once cool, carefully remove the Beautyblender, rinse it thoroughly, and allow it to dry.
After cleaning your Beautyblender using any of these methods, it is essential to rinse it thoroughly to remove all soap residue. Gently squeeze out the excess water and lay the sponge flat on a clean towel or surface to air dry. Avoid placing it in an enclosed space while drying to prevent mildew formation.
Properly cleaning your Beautyblender not only ensures good hygiene but also helps maintain the integrity of the sponge. Regular cleaning removes dirt, oils, and bacteria, allowing for a perfect makeup finish every time.
Cleaning Tips for Beautyblender and Makeup Sponges
Properly cleaning your Beautyblender and makeup sponges is key to maintaining their performance and extending their lifespan. Follow these easy steps to ensure a thorough cleanse:
- Dampen: Before you begin cleaning, dampen your sponge slightly with water. This will help the soap or cleanser penetrate better and loosen any makeup residue.
- Mild Soap or Cleanser: Apply a small amount of mild soap or cleanser to your sponge. Gently massage the soap into the stained areas, making sure to work it in well. Focusing on the material that covers the sponge’s inner foam, usually made of a soft, porous material.
- Rinse: Rinse the sponge under running water, squeezing gently. Continue rinsing until the water runs clear and all soap suds are gone. This ensures that there is no residue left behind that could affect the next makeup application.
- Remove Excess Moisture: After rinsing, gently roll the sponge in a clean towel to absorb excess moisture. Avoid wringing or twisting the sponge, as this can damage its shape.
- Drying: Lay the sponge flat on a clean surface and allow it to air dry completely. Avoid placing it directly on a countertop or in an enclosed space, as this can promote moisture buildup and potential mildew growth.
By following these cleaning tips, you’ll be able to maintain the cleanliness and functionality of your Beautyblender and other makeup sponges. With proper care, your sponge will continue to provide smooth and flawless makeup application.
For visual reference, here’s a table summarizing the cleaning tips:
| Step | Instructions |
|---|---|
| Dampen | Dampen the sponge with water before cleaning. |
| Mild Soap or Cleanser | Gently massage the soap or cleanser into the stained areas of the sponge. |
| Rinse | Rinse the sponge under running water until all soap suds are gone. |
| Remove Excess Moisture | Gently roll the sponge in a clean towel to absorb excess moisture. |
| Drying | Lay the sponge flat on a clean surface and allow it to air dry completely. |
Why Proper Cleaning Matters
Taking the time to clean your makeup sponge regularly offers several benefits. Firstly, it helps to remove bacteria, oils, and makeup residue that can accumulate on the sponge. This buildup not only affects the performance of the sponge but can also lead to breakouts and irritation if the sponge transfers the bacteria to your skin.
Furthermore, maintaining a clean sponge ensures a better makeup application. A clean sponge allows for smoother blending and more even coverage. It also prevents any unwanted transfer of old makeup colors onto your face, ensuring that you achieve the desired look every time.
Additionally, cleaning your makeup sponge is essential for the longevity of the product. By keeping it free of buildup, you can prolong its lifespan and get the most out of your investment.
Now that you know the proper cleaning techniques for your Beautyblender and makeup sponges, let’s explore some alternatives for cleaning in the next section.
Alternatives for Cleaning a Beautyblender
 If you find yourself without specialized cleansers or soaps for cleaning your Beautyblender, there are alternatives you can use to keep your sponge in pristine condition. While gentle dish soap or shampoo can be effective options, it’s essential to avoid using bleach or harsh cleaning agents as they may damage the sponge.
Facial cleansers can also work well for cleaning your Beautyblender, but keep in mind that using an expensive one specifically for this purpose may not be necessary. The key is to thoroughly rinse the sponge to remove all soap residue before allowing it to dry naturally.
If you are in a pinch and don’t have any of these alternatives available, it’s best to wait until you can properly clean your Beautyblender with the appropriate products. This will ensure that your makeup base primer is applied onto a clean and well-maintained sponge, providing you with the best results for your makeup application.
Additional Tips for Cleaning Makeup Sponges
To keep your makeup sponges in optimal condition, it’s important to follow a few additional tips. By incorporating these practices into your cleaning routine, you can ensure that your sponges remain clean, hygienic, and ready for flawless makeup application.
1. Avoid Closed Spaces While Drying
After cleaning your makeup sponge, it’s crucial to let it dry completely before using it again. However, be cautious not to let it sit in a closed space while drying, as this can create a moist environment where mildew and bacteria can thrive. Instead, place the sponge in an open, well-ventilated area to allow for proper air circulation.
2. Regularly Check for Stains and Buildup
It’s a good practice to regularly inspect your makeup sponge for any stubborn stains or residue buildup. If you notice any discoloration or grime, clean the sponge promptly to prevent further issues. Treating stains early on makes the cleaning process easier and ensures that your sponge stays in top condition for flawless makeup application.
3. Invest in Quality Cleansers or Soaps
Using a specialized cleanser or soap specifically designed for makeup sponges can greatly enhance the effectiveness of the cleaning process. These products are formulated to remove makeup residue and impurities while maintaining the integrity of the sponge. Investing in a good-quality cleanser can make your cleaning routine easier and more efficient.
By following these additional tips, you can extend the lifespan of your makeup sponges and ensure a flawless makeup application every time. Regular cleaning, proper drying, and the use of quality cleansers or soaps will help maintain the hygiene and performance of your makeup sponge.
Conclusion
Regularly cleaning your makeup sponges, including the popular Beautyblender, is essential for maintaining good hygiene and achieving a flawless makeup application. By following the proper cleaning methods and using gentle cleansers, you can prevent the buildup of bacteria and ensure that your sponges remain in optimal condition.
Not only does regular cleaning help to extend the lifespan of your makeup sponges, but it also allows for a seamless and long-lasting makeup finish. The importance of primer in makeup cannot be overstated, as it creates a smooth base for foundation, helps to minimize the appearance of pores, and enhances the longevity of your makeup.
Overall, taking the time to clean your makeup sponges and understanding the benefits of primer in makeup can greatly enhance your makeup routine. So, make sure to prioritize proper cleaning and incorporate a reliable makeup primer into your daily beauty regimen for that flawless and picture-perfect look.
FAQ
What is the importance of primer in makeup?
Primer is essential in makeup as it creates a smooth and even base for foundation, helping it adhere better and last longer. It minimizes the appearance of pores, fine lines, and imperfections, resulting in a flawless makeup finish.
What are the benefits of using makeup primer?
Using a makeup primer provides several benefits, including extending the wear of your makeup, controlling oil and shine, reducing the appearance of wrinkles and pores, and enhancing the overall look and longevity of your makeup.
What does primer do for makeup?
Primer acts as a barrier between your skin and makeup, ensuring a smooth application and preventing your makeup from settling into fine lines and pores. It also helps to even out skin tone, control oil, and enhance the longevity of your makeup.
How often should I clean my Beautyblender?
It is recommended to clean your Beautyblender or makeup sponge at least once a week to maintain good hygiene. However, cleaning it after each use is ideal to prevent the buildup of bacteria and maintain a flawless makeup application.
What is the function of makeup primer?
Makeup primer functions as a preparatory step before applying foundation. It helps to create a smooth canvas for makeup, minimize the appearance of pores and imperfections, control oil and shine, and enhance the overall longevity of your makeup.
How can I clean my Beautyblender?
There are several effective methods for cleaning your Beautyblender. These include using a texturized silicone pad to gently scrub the sponge, using a gentle soap or cleanser, soaking the sponge in a liquid cleanser, or even microwaving it. Proper rinsing and drying are essential to maintain the integrity of the Beautyblender.
What are the advantages of using a makeup primer?
Using a makeup primer offers several advantages, such as providing a smooth base for foundation, improving makeup application and longevity, minimizing the appearance of pores and fine lines, and enhancing the overall look and finish of your makeup.
How can I achieve a flawless makeup finish with primer?
By using a makeup primer, you can achieve a flawless makeup finish by creating a smooth and even base for your foundation, minimizing the appearance of pores and imperfections, and enhancing the longevity and adherence of your makeup.
What is the best way to clean a Beautyblender or makeup sponge?
To clean your Beautyblender or makeup sponge, dampen it slightly before applying soap or cleanser. Gently massage the soap into the stained areas, rinse it under running water until the water runs clear, and then roll it in a clean towel to remove excess moisture. Finally, lay it flat to dry.