Protective hairstyles for curly hair are one of the best ways to protect hair while staying active. Many people with textured curls change routines to avoid breakage — a stat often cited in discussions about curl care is that a significant number of Black women alter gym habits because of hair concerns (check the original source for the exact figure). Smart protective styles reduce damage from heat, over-styling, friction, and harsh weather.
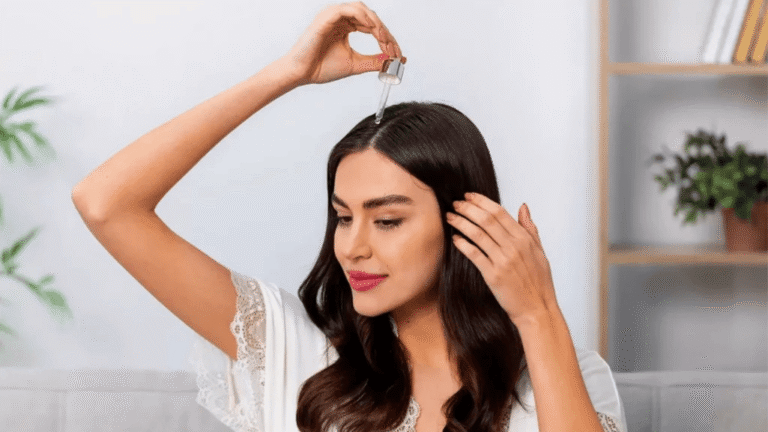
Sweat can make curls feel dry and tangled after a workout — salt, oil, and sweat can sit at the scalp and, if not rinsed or refreshed, may cause itch or irritation for some people. Tools like a sweatband can help keep sweat off the hair during exercise, and follow-up care (gentle cleansing and moisturizing) protects curl health. Many curl-care routines pair physical barriers with targeted products such as root-refresh sprays or clarifying shampoos to remove buildup without stripping natural moisture.
For workouts, choose simple protective styles that keep hair off the face and reduce manipulation — braids, space buns, and high slicked buns are reliable go-tos. After your session, rinse or refresh the scalp, use a gentle cleanser or clarifying shampoo when needed, and apply a leave-in or light moisturizer to the ends to prevent dryness and breakage. Avoid sleeping with wet hair to reduce the risk of discomfort or scalp irritation.
Key Takeaways
- Use protective hairstyles to reduce daily damage and protect curls during activity.
- Manage post-workout sweat by gently cleansing or using a root-refresh product, then re-moisturize the hair and ends.
- Choose low-tension styles (braids, buns) and protective accessories (silk/satin scrunchies or bonnets) to keep curls healthy.
- Avoid sleeping with hair wet and rotate styles to minimize stress on the same areas of the scalp.
- Try one protective style this week and track whether your hair feels less dry or shows less breakage after a month.
Understanding Protective Hairstyles
Protective hairstyles are intentional ways to tuck or secure hair so the ends are shielded and the curls face less daily wear. For people with curly hair, these styles reduce friction, limit manipulation, and make it easier to retain moisture — all of which help hair stay healthy over time.
Definition of Protective Hairstyles
A protective hairstyle tucks the hair — especially the vulnerable ends — away from friction and environmental stress. Simple examples are buns, chignons, milkmaid braids, and low-tension updos; each hides the ends and reduces daily wear from brushing, weather, or repeated styling.
Benefits of Protective Hairstyles
Here are the practical wins you get when you adopt protective styles regularly:
- Hair damage reduction: Tucking ends into buns or braids cuts down on rubbing and split-end formation — for example, a low bun reduces pillow friction overnight.
- Moisture retention: Styles that limit exposure (like twists and protective updos) help leave-in conditioners and oils stay put, keeping curls hydrated longer.
- Longevity and low manipulation: Protective styles need less daily styling — that means fewer pulls, less heat, and more consistent length retention over months.
A quick example: the Pineapple updo (a loose high gather) protects curl shape while you sleep; pair it with a silk or satin pillowcase or bonnet to further reduce friction and keep moisture at the ends.
Historical Context
Protective styling has deep roots across cultures. From intricate African braiding traditions to historic updos in Mediterranean cultures, people have long used styles to signal identity and preserve hair health. When referencing history, consider linking to reputable sources — phrasing claims as “historical accounts show” or “many cultures used” helps keep statements accurate without overstating causation (for example, longer hair in some records may relate to care practices, genetics, and social customs).
Using these long-standing approaches — adapted with modern products and tools — gives you practical ways to protect curls now. For quick navigation, the next sections show step-by-step methods and examples you can try this week.
Importance of Protective Hairstyles for Curly Hair
Curly hair has unique texture and porosity needs — which means careful hair care matters more than one-size-fits-all routines. Protective styles support the natural curl pattern, reduce daily handling, and help maintain the hair’s structure so curls stay healthier over time.
Preventing Breakage
Certain curl types — especially finer or highly porous coils — are more prone to breakage when dry or over-manipulated. Protective styles such as box braids, cornrows, and two-strand twists keep the ends tucked away and lower daily friction. Practical tip: alternate your styles and avoid tight tension to protect edges and the scalp.
These protective styles act as a barrier against heat and humidity, and they reduce the need for daily styling — less heat and fewer brushes equals less breakage in the long run.
Maintaining Moisture
Moisture is the single biggest factor in healthy curls. Protective styles help trap moisture from leave-ins and oils so hair stays hydrated longer. For high-porosity or 4C textures, try applying a lightweight leave-in, sealing the ends with a natural oil (jojoba, argan, or shea butter), then styling into a protective updo to minimize daily dryness.
Quick routine by curl type: 3A–3B — light twists or loose buns with a silicone-free leave-in every 3–4 days; 3C–4A — two-strand twists or braids with weekly moisturizing and a light oil seal; 4B–4C — low-tension braids or twists with nightly satin protection and targeted deep-conditioning every 1–2 weeks.
Using light natural oils on the ends and a consistent leave-in will reduce dryness and lower daily manipulation. Pair these simple product steps with low-tension protective styles to keep curls strong and growing.
The Two-Strand Twists for Curly Hair
Two-strand twists are a low-tension, versatile protective style that works for many curl types. They lock in moisture, minimize daily manipulation, and can double as a styling method (twist-outs) when you take them down.
Step-by-Step Guide
- Preparation: Start with clean, damp hair. Apply a lightweight leave-in to hydrate and a detangler if needed. Gently detangle with a wide-tooth comb from ends to roots.
- Sectioning: Divide hair into sections sized for how long you want the twists to last — smaller sections = longer-lasting, more defined twists.
- Twisting: Take two even strands and twist them around each other from the root to the tip. Keep tension gentle — firm enough to hold but not so tight it pulls at the scalp.
- Oiling & Seal: Lightly apply oil (jojoba or argan) to the ends to seal moisture — oils are best at the ends rather than heavy on the scalp for most people.
- Drying: Air dry fully (recommended) or sit under a hooded dryer. Make sure twists are completely dry before covering or sleeping to prevent damp-related issues.
- Optional Styling: Decorate with beads, clips, or use twists as a base for updos. For gym sessions, pull into a pineapple or wrap with a silk scarf.
Benefits of Two-Strand Twists
Two-strand twists reduce manipulation, help your hair retain moisture, and give you a heat-free way to style. Twist-outs offer defined, soft curls when undone — a great benefit for styling without heat. Expect twists to last anywhere from 1–6 weeks depending on hair texture, maintenance, and the size of sections.
Maintenance tip: refresh twists by lightly misting with a leave-in spray and re-sealing the ends with oil every 5–7 days. If your scalp is sensitive, place oil only on the ends and use a targeted scalp tonic sparingly.
The High Bun: A Simple Protective Style

The high bun is a go-to curly hair protective hairstyle because it’s quick, low-manipulation, and keeps the edges and ends tucked away. Gathering hair at the crown removes weight from the hairline and reduces daily rubbing — which can lower breakage when done correctly and with gentle tension.
Adapt the high bun for daytime (sleek or messy) and overnight (loose, high pineapple) use. Protect the style with a silk or satin scrunchie and a bonnet to reduce friction and help keep moisture locked in. For extra style, add a headband or scarf — Instagram-friendly looks can be protective, too, when they don’t pull at the roots.
How to create a low-tension high bun (quick)
- Prep: Lightly mist dry hair or apply a small amount of leave-in — avoid heavy products that weigh the bun down.
- Gather: Flip hair up to the crown and collect it with fingertips; keep the grip relaxed to prevent edge tension.
- Secure: Use a silk or satin-covered scrunchie (or a fabric hair tie) rather than a thin elastic to avoid creasing and pulling.
- Finish: Tuck loose ends into the base or wrap them around the bun for a neater look; for overnight, keep the bun loose and cover with a bonnet or scarf.
After the gym: if the scalp is sweaty, rinse or cleanse with a gentle shampoo and follow with a light leave-in and oil on the ends before creating a protective high bun. Quick post-workout care prevents dryness and helps the bun last longer without damage.
Style note: high buns are adaptable — for very short hair try a mini bun or multiple small buns at the top; for longer hair, create volume by lightly teasing the crown before tying. The goal is a protective look that supports curl health while letting you experiment with your look.
How to Effectively Use the Pineapple Method
The pineapple method is a simple, low-effort protective style that preserves curl shape overnight by keeping hair piled loosely at the top head. It’s a fast way to reduce friction, prevent flattening, and keep curls looking refreshed in the morning.
What is the Pineapple Method?
Pineappling means flipping your hair forward and gently gathering it at the crown so the curls rest on top like a pineapple crown. Secure lightly with a silk or satin scrunchie or scarf — the goal is to lift the hair away from the face and pillow while keeping the roots relaxed.
A small survey noted that some curl-care writers adapt the method (double or triple pineapples for short hair) — use whatever variation keeps your curls secure without pulling at the edges. Remember: silk and satin are about minimizing friction, while “satin” describes a weave and “silk” is a natural fiber; both reduce rubbing compared with cotton pillowcases.
Steps to Achieve the Pineapple Method
Follow these quick steps to keep curls intact overnight:
- Start with dry, well-moisturized hair — damp hair can cause creases and mildew if kept wrapped too long.
- Flip your hair forward and gather it at the crown; keep the hold loose to avoid tension on edges.
- Secure with a silk or satin scrunchie or scarf — avoid thin elastic bands that dig into the hair.
- If short, create multiple mini pineapples; cover with a satin bonnet or sleep on silk pillowcases to keep friction low.
Tailor the method to your hair length and texture. For long, heavy curls, a looser, higher pineapple with a bonnet works best; for short textures, mini-pineapples or a loose top knot keep hair protected. Avoid sleeping with hair wet and always use a silk or satin barrier where possible to keep your curls hydrated and reduce morning frizz.
Plopping: A Heatless Drying Technique

Plopping is a heat-free technique that speeds drying while preserving curl definition and volume. Instead of rough-towel rubbing, plopping uses a soft cloth (a cotton T-shirt or microfiber towel) to cradle damp hair and encourage clump formation, reducing frizz and mechanical damage.
What is Plopping?
To plop, you place a soft cloth flat, bend forward so damp hair falls into the center, then wrap and secure the fabric so your curls sit on top of your head. The cloth absorbs excess water while keeping curls compressed and separated, which preserves shape and speeds drying compared with full air-dry time.
Benefits of Plopping
Plopping can reduce frizz, boost root volume, define curls, and shorten drying time — all without heat. It’s a gentle way to get fuller, more defined curl patterns while lowering the damage that hot tools cause.
- Faster drying time versus full air-dry for many curl types.
- Improved curl definition and reduced frizz.
- More root lift and volume without heat.
- Less mechanical damage compared with blow-drying or rough towel-drying.
Plopping works well for many people with curls, though thicker, very long hair may need root clipping or shorter plopping sessions to avoid compression that flattens the shape. If your hair has heavy product buildup, clarify first so the cloth can absorb moisture effectively.
Steps to Plop Your Hair
Follow these steps for effective plopping:
- Apply your usual styling products to clean, well-detangled damp hair.
- Lay a cotton T-shirt or microfiber towel on a flat surface (T-shirts are gentler for many curl types).
- Flip forward and place your curls in the center of the cloth; wrap and tie at the nape or back of the head.
- Leave for 10–30 minutes for light curl refresh, or overnight for maximum benefit (adjust time by thickness).
- Unwrap gently and finish with light oil or mousse for hold and softness.
Plopping is a practical way to protect curls and reduce styling damage. Add it to your routine when you want defined, frizz-reduced curls without heat — and remember to choose a soft cloth like a cotton T-shirt or microfiber towel that works best for your curl type.
Using Silk or Satin Pillowcases
Switching from cotton pillowcases to silk or satin is one of the easiest, most effective steps to protect curls. These smooth surfaces reduce friction, so your hair loses less natural oil and experiences fewer tangles and breakage while you sleep.
Quick note on terminology: “silk” refers to the natural fiber (luxury, breathable), while “satin” describes a smooth weave that can be made from silk or synthetic fibers (often more budget-friendly). Both satin and silk pillowcases help keep hair healthier than cotton pillowcases by minimizing friction and helping you keep hair moisturized at the ends.
If you prefer silk (a natural fiber), look in the premium range; if budget is a concern, a charmeuse or satin weave made from polyester can still reduce friction and protect curls. Practical tip: pair a silk/satin pillowcase with a bonnet or sleep scarf to keep the protective style in place.
Care note: follow the manufacturer’s washing instructions — many silk pillowcases recommend hand wash or a delicate cycle and air-drying; satin/polyester options are often machine-washable but check labels. Clean linens and a sleep cap help keep hair healthy and reduce product transfer to bedding.
The Crown Braid as a Protective Style

The crown braid is an elegant, low-tension protective style that wraps braids around the head to tuck the ends and shield them from friction. It works for many curl textures and lengths, and can be dressed up or kept casual while protecting the hair from breakage and environmental stress.
How to Create a Crown Braid
Crown braids are surprisingly approachable on curly hair. The basic idea is braiding around the head so the most fragile ends are secured and out of the way. Below is a straightforward method that keeps tension low and comfort high.
- Start with detangled, slightly moisturized hair — dry hair holds a braid shape better, but avoid overly dry strands.
- Part hair into two sections down the center for two braids, or gather a single section to do one braid around the head.
- Braid each section using a Dutch or three-strand braid, working from the nape toward the top and around the head.
- Secure ends with small fabric-friendly elastics and pin each braid into a crown shape with bobby pins, tucking ends under the braid.
- Avoid over-tightening — aim for low tension to protect edges and scalp health.
Benefits of the Crown Braid
Crown braids offer low tension, easy scalp access for oils or treatments, and good durability — a well-done crown braid can last 1–2 weeks with proper care. It’s comfortable, protective, and versatile for different lengths and occasions.
Troubleshooting: if braids frizz, smooth edges with a bit of leave-in or light gel and re-pin loose sections. For very short hair, try partial crown braids or twists that secure only the top and leave the back free. Always prioritize comfort over tightness to avoid breakage.
Curly Hair Protective Styles for Sleeping
Quality sleep matters — and your nighttime routine should protect your curls, not work against them. Protective hairstyles for sleeping reduce friction, stop tangles, and help retain moisture so curls stay healthy and look their best after a night of rest.
Why Protect Your Hair While Sleeping?
When you sleep on rough cotton, curls rub against the fabric and each other, which can dry ends and cause breakage over time. Using a satin or silk pillowcase or tying hair up in a protective style lowers that friction and preserves curl pattern and moisture.
Protective sleeping styles also shield hair from weather-related stress (wind, dry heat) and reduce the need for daily styling — less manipulation means healthier hair in the long run.
Recommended Sleeping Styles
Choose a sleeping style that matches your hair length and texture. Below are easy, effective options that reduce frizz and protect length.
- Pineapple Bun: A loose, high grouping that preserves curl shape — ideal for medium to long lengths. (Keep it loose to avoid edge tension.)
- Loose Braids: Single or two loose braids protect pattern and are easy for all hair lengths; great if you prefer morning waves.
- Twisted Top Buns: Two or more loose twists pinned into buns reduce contact and preserve length and volume.
- Bantu Knots: Best for kinky textures — they protect and create defined curls when unraveled.
- Large Twists & Overnight Rollers: Protect ends and create morning definition without heat.
- Plopped Hair: Use a T-shirt or microfiber to maintain shape and speed drying for many curl types.
Night routine checklist: (1) moisturize ends with a light leave-in or oil, (2) choose a low-tension protective style, (3) cover with a satin bonnet or sleep on a silk pillowcase, and (4) rotate styles weekly to avoid consistent stress on the same area.
Adjust by texture and length: shorter textures may prefer mini pineapples or satin bonnets, while very long or heavy curls may benefit from single loose braids or plopping to avoid compression. Experiment with one style for a week to see which preserves your curl pattern and look best in the morning.
Easy Protective Hairstyles for Curly Hair

You don’t need complicated techniques to protect curls — choose low-manipulation styles that suit your texture and length. Below are easy options with quick how-tos and product tips so you can keep styling time short and results long-lasting.
Quick Styles & How-Tos
- Two-strand twists: Divide hair into sections, apply a lightweight leave-in, twist two sections together from root to tip. Great for moisture retention and easy maintenance — refresh with a spritz and oil on the ends. (Twists also give a heat-free twist-out when you undo them.)
- Box braids / cornrows: Low-manipulation styles that protect ends and can last weeks. Use braids as a base for updos; keep scalp clean with a gentle cleanser and apply light oils to edges as needed.
- Finger coils: Define smaller curls using a curl cream or lightweight gel by coiling small sections around a finger; this is styling with protection when you avoid heat and limit daily touching.
- Twisted buns & Dutch braids: Quick to create and gentle on the scalp — ideal for active days and an easy transition to night protection.
Product guidance: prioritize a lightweight leave-in for daily moisture, a water-based curl refresher spray for in-between washes, and a light gel or cream for definition. For sealing, choose a small amount of jojoba, argan, or shea oil on the ends — applied sparingly to avoid buildup.
Styling tips: limit daily manipulation — the fewer times you touch and restyle, the better. Rotate styles to reduce repeated stress on the same areas, and give hair periodic breaks (wear a satin wig or go low-manipulation) to support long-term health and growth.
Common Mistakes to Avoid with Protective Styles
Protective hairstyles for curly hair can be a game-changer — but mistakes in how you install and maintain them can cause more harm than good. Below are the most common errors and simple fixes to keep your curls healthy and thriving.
Too-Tight Styles
Tight braids, buns, or elastics that pull at the hairline cause tension, soreness, breakage, and even traction alopecia over time. Fix: aim for low-tension installs, use fabric-covered hair ties or scrunchies instead of thin elastics, and alternate your parting and style placement weekly.
Lack of Moisturizing
Putting hair into a protective style and then neglecting moisture leads to dryness and brittle ends. Fix: set a moisturizing schedule — light leave-ins or a hyaluronic-acid-based mist every 3–5 days for many textures, and seal ends with a small amount of natural oil (jojoba, argan, or shea) to prevent dryness.
Skipping Scalp & Cleanliness
Leaving buildup on the scalp can cause itch, odor, and even follicle issues. Fix: schedule gentle cleansing (clarifying or low-lather shampoo) every 2–4 weeks depending on product use, and use a scalp tonic or light oil to soothe after washing.
Overuse of Heavy Products
Using heavy butters and oils in excess can cause buildup under styles and weigh down curls. Fix: use lightweight products for daily moisture and reserve heavier creams or butters for occasional sealing of ends.
Conclusion
Protective hairstyles are powerful for reducing breakage and keeping curls moisturized, but they must be used with good care. Avoid tight installs, keep hair and scalp clean and well-moisturized, rotate styles, and give hair periodic breaks to maintain long-term health and growth.
Tip: Try one protective style this week (one) and monitor your hair’s moisture and breakage. Small, consistent changes in care often produce the best long-term results for hair health.
FAQ
How often should I moisturize protective styles?
Moisturize lightly every 3–7 days depending on your texture and climate; use a water-based leave-in spray and seal the ends with a touch of oil.
How long can I keep a protective style in?
Most protective styles safely last 2–6 weeks with proper care; don’t exceed that without giving hair a break to detangle, deep-condition, and trim as needed.
What should I avoid while wearing protective styles?
Avoid tight tension, heavy product buildup, skipping scalp care, and leaving styles in too long — these are the main causes of damage.