Choosing the right adhesive shapes how your lashes hold, how easy application feels, and how polished your makeup looks from day to night. Editors tested 23 products over a month in lab and at-home settings to judge hold, comfort, removal, wear, and value.
Our roundup includes brush-on options like the Lilly Lashes Clear Brush-On Lash Adhesive, a favorite for precise application and a clear finish after it briefly turns blue. We also tested two-in-one solutions such as the D’Lashes Adhesive Eyeliner Pen for faster routines and steady hold.
Expect guidance on dry time, tack level, and whether a product dries clear or black. We compare formats suited to beginners and pros, highlight comfort and ingredient notes for sensitive skin, and separate consumer strip options from studio-only strong-hold formulas.
See full test notes and picks to match your routine, preferred finish, and desired wear so lashes stay secure without corner lift.
Key Takeaways
- Lab and real-world tests of 23 products reveal clear winners for hold and comfort.
- Brush-on, squeeze-tube, and liner-style options suit different skill levels.
- Look for dry time, tack, and finish (clear vs. black) when choosing a product.
- Ingredient notes matter for sensitive eyes; many top picks balance comfort and strong hold.
- We separate consumer strip adhesives from pro studio formulas to avoid confusion.
Best false eyelash glue adhesives: Editor’s picks and lab-tested standouts
These editor-vetted picks stood out for their control at the lash line, fast set times, and dependable wear.
Lilly Lashes Clear Brush-On Lash Adhesive — A small precision brush gives accurate laydown along the lash band. The formula goes white, flashes blue, then dries clear. It dries quickly and offers a strong hold, so position lashes promptly to avoid sliding.
Budget buy: Drugstore brush-on — Affordable and easy to find. The thin brush dries fast and keeps lashes secure all day. Wipe excess from the applicator to prevent mess and boost comfort.
Strong hold favorite: Velour — Comes in black or clear and delivers a secure grip once tacky. It takes a bit longer to reach tack, so gently blow on the band to speed set time. Comfortable wear with reliable hold.
Two-in-one: D’Lashes Adhesive Eyeliner Pen — Combines liner and adhesive for quick application. The felt-tip is handy for on-the-go routines, though tack is less intense than classic options.
Best applicator control: Sephora Collection Brush-Tip — A long, dense brush gives excellent control for single-pass application. Use a thin layer to avoid excess transfer to the lid. Black finishes pair well with winged makeup; clear is ideal for invisible seams.
- Pre-trim strips and test lash band fit before applying.
- Focus on inner and outer corners when setting lashes.
- Choose clear formulas for subtle seams and black for liner-intense looks.
How to choose the right lash glue for your falsies and eyes
How you apply product at the lash line affects hold, comfort, and how natural lashes blend with strips.

Application method: brush-on, squeeze tube, or adhesive eyeliner
Brush-on offers targeted control along the lash band and is easiest for beginners. A thin, even film helps avoid flooding the lid.
Squeeze tubes dispense more freely and need a steady hand to place glue precisely on the glue band.
Adhesive eyeliner simplifies application by letting the liner act as the bond. It speeds routines but can give slightly less tack for dramatic strips.
Color choice: clear, black, or white
White formulas usually dry clear and let you see placement. Black blends with dark lashes and doubles as subtle liner. Clear finishes disappear under minimal makeup but require careful application.
Wait for slight tack before seating lashes — that tack reduces sliding and improves corner hold.
Ingredients for sensitive eyes
Look for latex-free and fragrance-free formulas to reduce irritation. Most products use acrylic copolymers for bonding. If you have sensitive eyes or sensitive skin, avoid known irritants and test a small amount near the outer eye first.
- Keep a clean spoolie or small brush for precise application.
- Check packaging for dose control; fine brush tips deposit thinner films.
- For more buying guidance, see our detailed guide: lash adhesive recommendations.
Waterproof lash adhesive for all-day wear and sensitive skin
For long days and unpredictable weather, a waterproof lash product with reliable 24-hour hold keeps strips secure without constant touchups.
What sets a waterproof lash product apart is a high-performance formula that resists humidity, sweat, and oils so lashes stay put through the day. Many use “24hr Hold Technology” to promise a bond that won’t lift or need reapplication.

Latex-free, paraben- and sulfate-free, vegan formulas with 24-hour hold
Choose options that are latex-free, paraben-free, sulfate-free, vegan, cruelty-free, and free of synthetic fragrance to reduce irritation around the eyes. These sensitive-skin-first formulas keep strong hold without harsh ingredients.
Removal and safety tips for waterproof bonds without irritation
Allow a thin, even coat along the lash band to tack before you place lashes. That tack reduces sliding and gives the best long-term hold.
- Saturate a cotton swab with makeup remover and glide along the band to remove eyelash glue gently.
- If needed, press a cotton pad soaked in makeup remover to the lid to break down the bond, then lift carefully.
- Use a balm-based cleanser for any residue and avoid pulling to prevent irritation.
“Never sleep in waterproof lashes and avoid layering excess product near the waterline.”
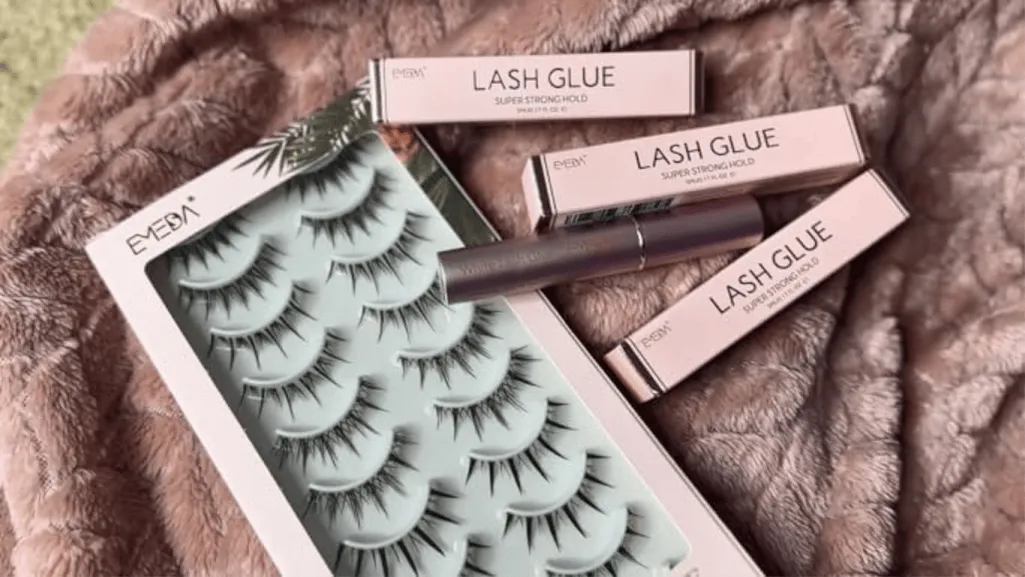
Store tubes tightly closed (about 0.17 fl oz/5 mL typical fill) and replace open bottles regularly. If corners lift, add a pinpoint of glue, wait for tack, and press inner and outer corners to secure the strip.
Pro corner: lash extension adhesives vs. strip-lash glue
Not all bonding products are interchangeable. Pro formulas are engineered for individual lash extension application and studio workflows. They cure, bond, and flex differently than consumer strip products.

When to use pro adhesives: studio conditions, humidity, and cure speed
Studio environment matters. Low humidity and controlled temperature let technicians choose fast-drying options for quick isolation and efficient application. In higher humidity, pros pick slower-cure adhesives to prevent premature set.
Popular pro SKUs: fast-drying, long-retention options
Brands like Lashbox LA offer Superhero (Iconic Bond Technology), Omega, and Everlasting Volume EX. These products deliver fast set, flexible bonds, and retention up to eight weeks when applied correctly.
Who should buy: lash artists and advanced users
Pro adhesives are for licensed technicians and trained advanced users. They require skill, correct applicators, and removal methods. Consumers using strip lashes should stick with consumer-grade strip products to avoid damage and unsafe removal.
- Match adhesive to humidity, cure time, and client sensitivity.
- Stock complementary SKUs ($48–$89) to adapt seasonally.
- Seek certification before using pro products on clients.
“Professional adhesives deliver studio-grade hold and retention when used by trained hands.”
Expert-backed tips for application, wear, and easy removal
Mastering tack time and placement gives the most reliable hold and the cleanest finish at the lash line.

The best way to apply is to coat the lash band evenly, then wait 20–40 seconds until the glue feels slightly tacky. Set the strip directly on the lash line for a near-invisible seam.
Anchor the center first, then press inner and outer corners. Use tweezers or the applicator tip for precise pressure without disturbing the product.
Use minimal product: a thin layer bonds stronger and cleaner than excess. For liner-ready placement, map your shape with a tip eyeliner formula and press the false lash onto that guided line.
- After seating, gently flip lashes upward and blend with mascara so natural lashes merge with the strip.
- If a corner lifts, dab a touch of lash glue, wait a few seconds, then re-press.
- To remove, sweep a makeup remover–soaked cotton swab along the glue band, then press a cotton pad if needed.
If residue remains, massage a balm cleanser to break down adhesive and rinse. Clean glue buildup from the band after each wear to extend strip life.
“Never tug at the band; use remover and patience to protect natural lashes and skin.”
Hygiene reminder: never share false eyelashes or applicators. Keep opened product capped and replace regularly for consistent performance.
Conclusion
strong, Pick a dependable bonding product that matches your daily routine and skill level for the most consistent wear.
Recap: choose a precise brush-on eyelash glue for everyday reliability, a strong-hold pick when maximum security matters, or a liner-hybrid for quick application with minimal fuss.
Fit-to-routine matters: match dry time, finish (clear or black), and applicator to your comfort. For sensitive skin, favor latex-free, fragrance-free, clean-leaning formulas to keep the eye area calm while maintaining hold.
Pro-grade lash adhesive products are for trained studio use, not casual strip application. Use thin, even coats, wait for tack, and remove gently with the right remover to protect natural lashes.
Build a compact kit—favorite eyelash glue, tweezers, scissors, and makeup remover—and you’ll have reliable wear and seamless lashes from morning to night.
FAQ
What is the best way to apply lash adhesive for a secure, long-lasting hold?
How do I choose between brush-on, squeeze-tube, and adhesive eyeliner formats?
Which formulas are best for sensitive or reactive eyes?
Should I use clear or black adhesive?
Are waterproof adhesives safe for daily wear and sensitive skin?
How do I remove adhesive without damaging my natural lashes or irritating my eyes?
Can I wear strip bands with mascara or over lash extensions?
How long should a good lash adhesive hold, and what affects wear time?
Are pro-grade extension adhesives different from strip-lash glues?
What tools and removers are recommended for safe application and removal?
How can I test for allergies before using a new adhesive?
What are quick fixes if adhesive gets into my eye or causes irritation?
Can I reuse strip bands and how should I clean them?